4

Hat Commission – Poppy The Dog

At the end of last year I had 2 hat commissions, one for a dog and one for a penguin! I’ll leave the penguin reveal for another day, today I am going to show you Poppy the dog!
The lady who commissioned it wanted a hat that looked like her dog Poppy, who is a beautiful beagle. Here are the pictures!

DSC03092

She has big floppy ears and a squishy 3d nose

DSC03100

With a lovely snug lining to keep you warm in the winter months

DSC03094

And giant fluffy pom-poms! (Honestly, they’re massive!)

This was a really fun commission! It is completely my own design, and it was really fun creating it around someone’s pet :)

What do you think?

Sam xx

0

Free Pattern – Bunny Egg

Hey everyone! Sorry It’s been soooo long since my last post! Our internet was broken from December to February (yep, right through Christmas…), and since then I’ve been trying to catch up! However I’m back with a bang with a free Easter crochet pattern!

Free Pattern - Crochet Bunny Egg By The Giraffe's Hat

Ready to get started?

Tools 
3.5mm Hook
Darning Needle
Toy Stuffing
9mm Safety Eyes
Safety Nose (Optional)

Work in a spiral, using a stitch marker to mark the beginning of rounds

UK terminology – converted in the key below

Key  
DK – Double Knit/Single Crochet
Dec – Decrease (I use the decrease two together method)
* – Repeat

Body/Egg shape
Round 1: 6dc in magic ring
Round 2: 2dc in each stitch around (12)
Round 3: *2dc in next stitch, 1 in next* around (18)
Round 4: *2dc in next stitch, 2 in next* around (24)
Round 5-11: dc around
Round 12: *dec, dc in next 4* around (20)
Place safety eyes between rows 9 and 10, with 5 visible stitches between. On the row below place a safety nose (or sew one), making sure it is centered between the eyes. Begin stuffing and forming the shape, then stuff after each row continuing to shape as you go along.
Round 13: *dec, dc in next 3* around (16)
Round 14: *dec, dc in next 2* around (12)
Round 15: *dec, dc in next 1* around (8)
Round 16: decrease twice, dc in next 2 stitches (6)
Fasten off, weaving the tail through the stitches and pulling tight. Knot the end and feed through the body to secure.

Ears
Make 2
Round 1: 5dc in magic ring
Round 2: 2dc in each stitch around (10)
Round 3: *2dc in next stitch, 1 in next* around (15)
Round 4: dc around
Round 5: *dec, dc in next 3* around (12)
Round 6: dc around
Round 7: *dec in next, dc in next 3* around (8)
Round 8-12: dc around
Round 13: *dec in next, dc in next 3* around (8)
Fasten off without closing the hole, leaving a long tail for sewing. Flatten the ear, cupping it inwards slightly.

Sew the ears onto the body and you’re done!

Hope you like it! Let me know if you have any questions or need any help
Sam xx

3

Etsy Finds Friday – Mother’s Day Edition

I decided to save my Friday post for today so I could do a special Mother’s Day edition!

page - Mothers Day
Here are the links:
Ceramic Candle Holder – So pretty!
Set Of 3 Wooden Vases
Lime and Lemon Sugar Cookie Truffles
Glasses Case – Cute!
Mother’s Day Card
Lap Tray – Perfect for breakfast in bed!
‘Best Mommy’ Heart Ornament
Soap Gift Set – I love how fresh these look <3
Mother And Baby Spring Sheep – These sheep I made fit so well with this edition I had to include it! :)

I hope all mummy’s out there have had a great and relaxing Mother’s Day! As always, if you have an Etsy shop and would like to be featured in a future post leave me a comment :)
Sam xx

(I have a post coming up in the next few days about why I have been absent for a few weeks in case you have been wondering where I’ve been!)

6

Etsy Finds – Birthday Edition

Today’s Etsy Finds is a special edition as it was my birthday on Thursday! I have selected a range of things that I would have loved to receive ^_^

page - Birthday 2014
Here are the links:
3 Bath Cookies
Cat Mug In Back Or White (I NEED this!!)
Fondant Giraffe Cake Topper (I had to include a giraffe ;) )
Candy Birthday Card
Happy Birthday Cake Banner
Personalised Birthstone Necklace (This is beautiful)
Crackle Glass Earrings
Double Flap Clutch (I really want this, it’s so pretty and useful!)
Sleepy Time Epic Vegan Lip Balm (My lips are really sore at the moment so this would come in handy!)

As always, if you have an Etsy shop and would like to be featured in a future post leave me a comment :)

Sam xx

0

Etsy Finds Friday – Valentine’s Edition

Happy Valentine’s Day everyone! Hope you’ve all had a great day! <3
I thought today would be a great day to start this back up!

Here’s today’s Etsy Finds!

Valentines 2014
Here are the links:

Downloadable Wall Art
Couples Pillowcases (Cute!)
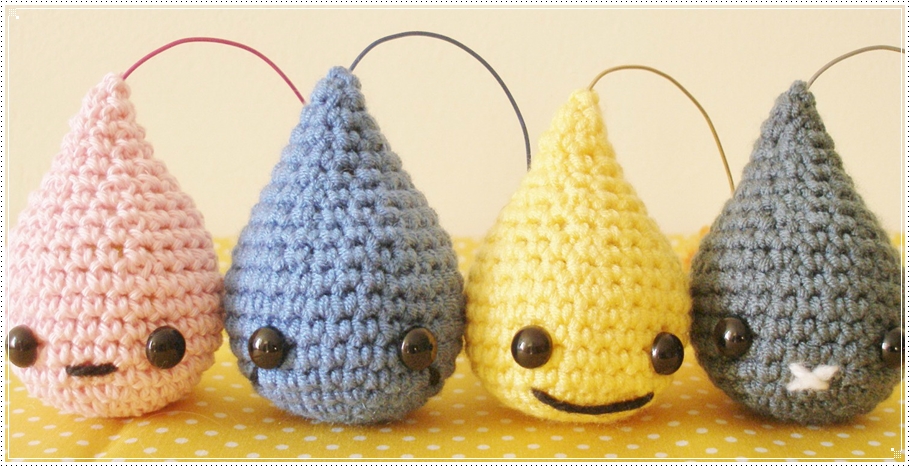
Love Drop Plush Charm (I had to include one of mine, it fit so well!)
Love You To The Moon Necklace (I love how this has the couples birthstones!)
Fingerprint Wall Art
Heart Bath Fizzies (I have to try these one day)
Felt Hearts
Heart Brownies (Yummy)
Hand Painted Card

As always, if you have an Etsy shop and would like to be featured in a future post leave me a comment :)

Sam xx


3

Pretty Little Bows – Valentines Gift Idea

Good morning!

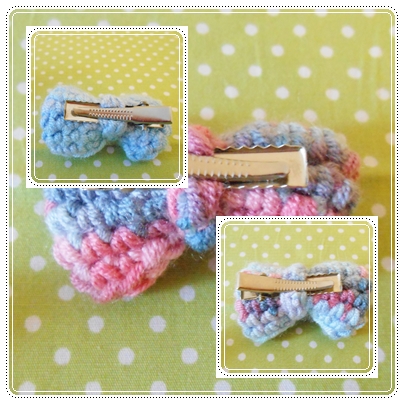
Mini Bow Hair Clips

These cute little bow hair clips are perfect for any age, from babies to adults!

Crocodile clips are attached to the back

Crocodile clips are attached to the back

They are made from lovely, super soft yarn and measure 4.5cm each – cute!

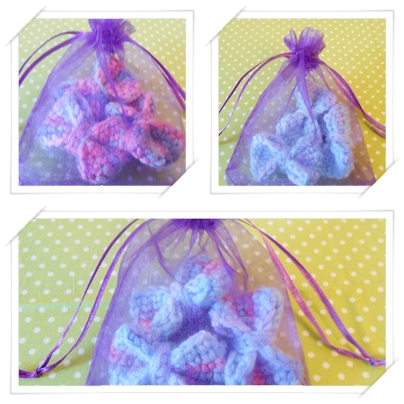
They come in pretty organza bags

They come in pretty organza bags

They are £7.50 for a set of 3, and can be posted anywhere in the world! Follow any picture for the link, or go here

Thanks for visiting today!
Sam xx

2

Pretty Crochet Flowers

Crochet Flowers
Thought you might like to see some pretty flowers I have made recently :) There are two different sets at the moment, one in luxury/premium yarn which is super soft and quite floppy, and one in standard yarn. The standard yarn is still really pretty though as you can see, and they are slightly bigger.

The luxury yarn is the ones in the background and the top picture, and the standard yarn is the one in the bottom picture. 

They are both listed on my shop here

Hope you like them!
Sam xx

4

My New Shop!!

I’ve finally opened my first ever Etsy shop! I’d love it if you could check it out :)

https://www.etsy.com/uk/shop/TheGiraffesHat

Here’s a sneak peak of what you will find there:

Preview of new shop
I hope you like everything! I currently only ship to the UK as I am trying to find a courier who can ship for much cheaper than the post office is offering! I’d welcome any advice!

Also, my shops facebook page is here if you would like to keep up to date with my shop!

Sam xx

78

Free Pattern: Weave Square

Here’s what I was making from this post! Did you guess right?

Weave Square - Free Pattern
I thought I’d share with you a square I have made! I got the idea from a picture I found online. I couldn’t find a pattern so created my own! I hope you like it :)

Weave Square - Free Pattern (materials needed)
Click here to add to your Ravelry library!

Skill Level: 
Easy to intermediate. The pattern is basic double crochet and half-treble crochet, but putting it together is a bit more complicated. I’ve explained each step as clearly as possible though, and included lots of photo’s to help 

Finished Dimensions:
4×4 inches, but it can be easily adjusted. If you need help with this just ask!

Yarn:
I used a mix of brands in DK. It can be any yarn, but remember it will change the dimensions if it is a different weight

Hook Size:
3.5mm

Other Materials:
Scissors
Darning Needle

Tension:
Unless you are after a specific sized square tension is not necessary. If you do need it to be specific, each strip should measure 9×1 cm each

Stitch Key:
This pattern is in UK terms; for the American terms please see ‘tips’ below 
htr – Half treble
dc – Double crochet

Tips:

  • I find weaving in the ends as you go along really helps. That way all you have to do at the end is weave the last end in. The way I do it is I crochet over the first loose end made, then sew in the one at the end of each strip. None of my strips had loose ends once I started connecting them, making things much easier and neater.
  • The coloured strips are only fastened down at the ends. 
  • American term conversion: htr in UK is hdc in US;  dc in UK is sc in US

Making the strips
You need to make 5 white, 2 orange, 2 medium yellow, 1 light yellow, or any colour combination! 

Row 1: ch 18. htr in the 3rd chain from hook, htr along (16 sts) Fasten off and weave in ends. Repeat until you have the right amount of strips.

Weave Square - Free Pattern (strips)

Putting the square together
Row 2: Join in with white on a white strip as if you were about to do another row of htr. dc 1. Then pick up one of the dark strips. Place it vertically at the back of the white strip and dc in the next 2 sts, making sure you go through both strips. dc in the next st on the white strip. Repeat this process with all of the coloured strips, overlapping and under-lapping alternately, with a dc between each one. Use the picture for guidance. End with a dc.

Weave Square - Free Pattern (strips)

Row 3: ch 1, 2 dc down the end of the white strip you’ve been working on, then ch 1. Pick up the next white strip and dc twice along the short edge, then ch 1. repeat with the rest of the white strips. Make sure you don’t dc through the edge of the coloured strip here, only crochet the white ones. The coloured strips only get dc along the short ends. You don’t need to worry about the placement of the coloured strips until you do the next side, so don’t worry about them for now.

Weave Square - Free Pattern (strips)
Row 4: This is where you start needing to make sure the strips are in the right place, but the weaving is not super important other than for guidance until you get to the white strips again. The main thing to remember is if it under-laps at the top then it does at the bottom too. Starting with the dark colour, overlap and under-lap in the right place, again using the picture for guidance. Then ch 1 and dc along in the same way as round 2.

Weave Square - Free Pattern (Third Side)
Row 5: Now you need to make sure the colours are weaved properly. All the coloured strips are fastened down so you will only be able to move the white strips. Once that’s done: *ch 1, dc in next 2 sts of the short end of the white strip* repeat along, making sure the strips are weaved correctly for the final time, ending with a ch 1

Row 6: starting with 2dc  in the next st (the corner), dc around the whole square, making sure you do 2 dc in the rest of the corners too Fasten off, weave in the final yarn end, and you’re done!

Weave Square - Free Pattern
Hope you enjoyed my tutorial! If you have any questions feel free to ask me, and if you send me photo’s of your finished squares I’ll post them here! (I’ll get round to this soon, I promise!)

If you’d like to save it for later here’s the Ravelry link!

If you’d find it easier to read this pattern in Hungarian, The wonderful Mercédesz has translated it over on her blog! Go here to check it out ^_^
Translations are always welcome as long as they credit me and link back to my blog. If you’d like to be added to the bottom of the pattern post your link below or message me!

Sam xx

2

Washi Tape Love! (And A Review)

Washi tape
I have given great thought to how I want my items to be packaged when I open my shop. One thing I knew – I wanted washi tape!! How things are packaged can influence peoples opinion on your business, and good packaging makes a good first impression and helps you to be more memorable. I wanted to coordinate with my logo and banner image so I chose brown (I will show you everything when we’ve perfected it!) I looked through every site and Etsy store that sold washi tape to find the perfect colour and style, and finally settled on this one.

The inside packaging

The inside packaging

Good first impressions, simple yet cute!

Cute! Looks like a candle :)

Cute! Looks like a candle :)

This pretty packaging instantly makes it a great gift idea!

Pretty!

Pretty!

What do you think? I love them!
The shop, Pretty Tape from Etsy, has a great selection of colours and styles for great prices. It was hard to stop myself buying more than these! I would totally recommend them, and I will be visiting again as soon as I can find an excuse :) They mostly sell washi tape, but also a few other things like rubber stamps and things for packaging. They are in America but shipping to me in the UK was nice and quick. I didn’t find any faults, and urge you to go check them out!

Thanks for visiting today!
Sam xx